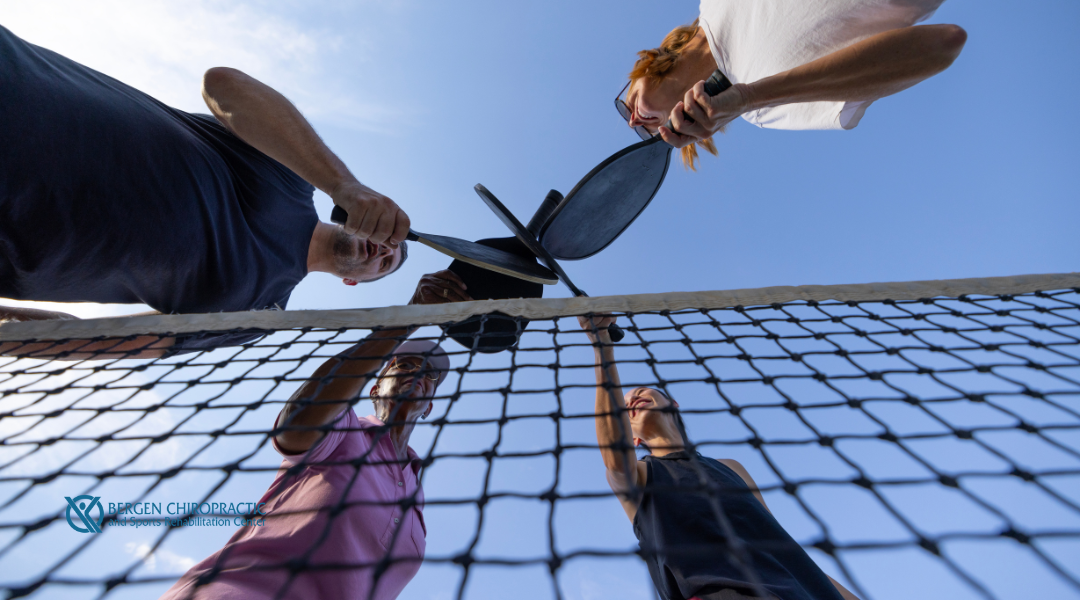
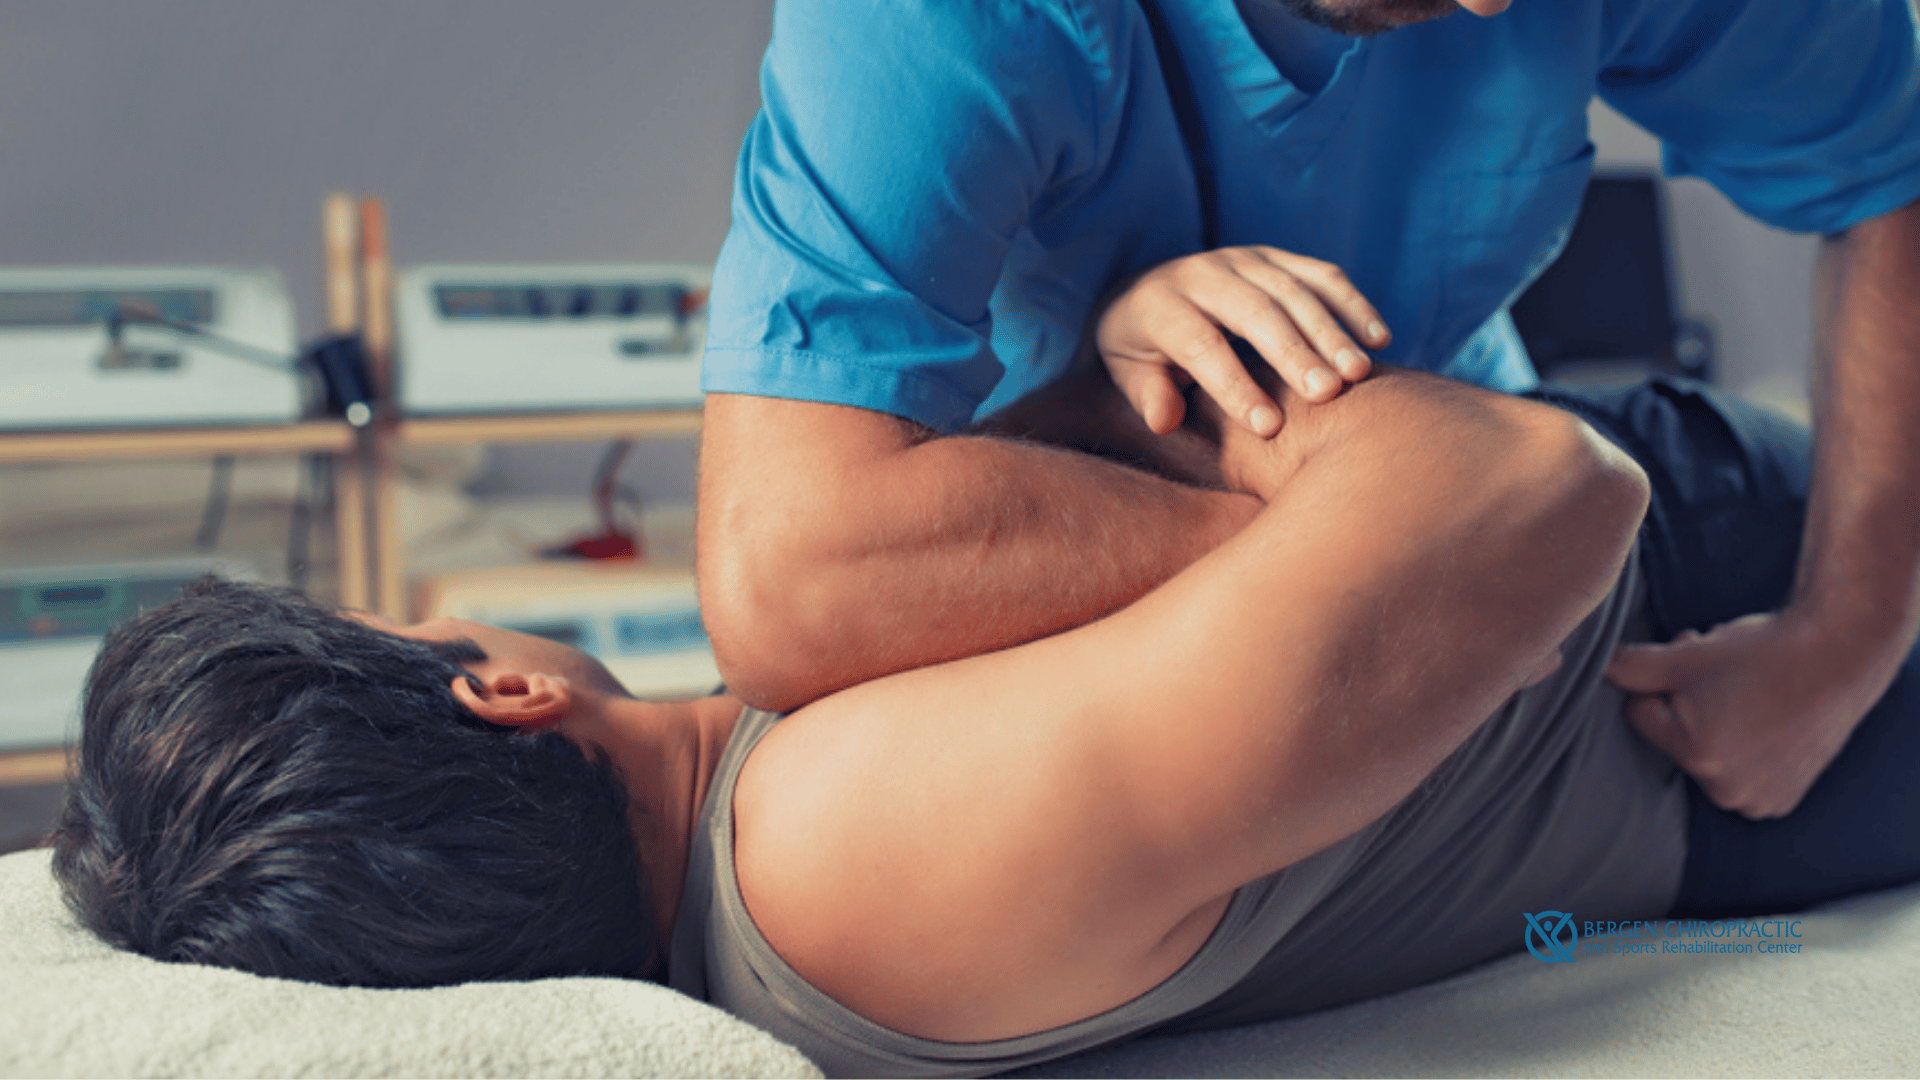
What is the Lower Crossed Syndrome?

What is the Lower Crossed Syndrome?

Do you live a sedentary lifestyle? In today’s world, that’s not a surprise at all. However, if your career or living situation requires prolonged sitting, it is important to properly take care of your body and avoid painful health complications such as lower crossed syndrome. Even if you work a lovely desk job or enjoy your comfy couch time, be sure to spend some time exercising and moving your body. Humans are not designed to stay cooped up, so continue reading to learn more about lower cross syndrome and exercises designed to avoid or alleviate its symptoms! 


What is Lower Crossed Syndrome?

Unterkreuz syndrome, more commonly known as Lower Crossed Syndrome, is caused by large muscle strength imbalances in the abdominal muscles and the gluteus maximus. According to the National Academy of Sports Medicine, the lower cross syndrome is one of the most common compensatory body patterns. It differs from the upper cross syndrome as it does not occur in the shoulders and neck but in the lower lumbo-pelvic region. 

When muscles become lengthened or shortened over time, the lower muscular imbalance results in postural changes of the neutral spine, lower back pain, and overactive muscles. Postural changes are most commonly viewed as an increased forward bend of the pelvis coupled with an excessive lower back arch. The uneven pull on your muscles forces the back muscles and hamstrings to work harder, leading to injuries. Because the lower cross syndrome causes overactivity in certain muscle groups, there is intense tightness of hip flexors and lumbar erector spinae.  


The Two Types of Lower Cross Syndrome

There are two different types of lower cross syndrome. While they are very similar and involve the same main muscle imbalances and common compensatory patterns, one mainly affects the hip flexors while the other affects the lower back. Unlike upper cross syndrome, which affects the upper trapezius, both lower cross syndrome subgroups are differentiated by how they alter the gluteal musculature’s postural alignment and change the myofascial activation patterns of the pelvic region, although they both result in tight muscles and a painful lower back. Often, physical therapy is the best option to resolve this painful condition and muscle weakness. 


#1: Posterior Pelvic Cross Syndrome

The first subgroup is called posterior pelvic crossed syndrome and dominates the axial extensor. In this type of lower cross syndrome, the pelvis has an anterior tilt while the knees and hip region are put into a slightly flexed position with unnaturally lengthened muscles. Often associated with a compensatory hyperlordosis of the lumbar spine and hyperkyphosis between the thoracic and lumbar spine, the condition leads to a decreased ability to breathe and control one’s posture. The tightened hip flexors and lumbar spine may become painful as they take on more strain to compensate for the weak muscles. 

Furthermore, due to the lack of stabilization within the abdominals and internal oblique, the thorax will move up to over 90 degrees, and the postero-inferior thorax will be hyper-stabilized. This means that exhalation becomes difficult as the rectus abdominis activation cannot lower the thorax into its neutral position. In short, the expiratory phase becomes shortened, and problems arise when the coordination between the transverses and the diaphragm is insufficient. 


#2: Anterior Pelvic Crossed Syndrome

The second type of lower crossed syndrome is called the anterior pelvic crossed syndrome and occurs when the abdominal muscles are too weak or too short. In this condition, the muscles compensate with minimal hypolordosis of the lumbar spine, hyperkyphosis of the thoracic spine, and head protraction. Thus, the anterior pelvic tilt forces the knees into a hyperextension. 


What Causes the Lower Crossed Syndrome?

The lower crossed syndrome is caused by either the shortening or lengthening of muscles within the pelvic or lumbosacral regions of the body. Often related to or caused by poor posture or prolonged sitting, the lower cross syndrome results from changing muscular length and increased stress on certain muscles and hip joints. When you maintain improper posture, training, or ability to perform daily tasks, the affected muscles bear the burden of one-sided stress or high tension. Although the lower cross syndrome is most often linked to poor posture, it can also be caused by general poor health or physical condition. 

Another common cause of the lower cross syndrome is prolonged sitting. You can cause an imbalance between the muscles as weakness occurs due to reduced mobility or prolonged sitting. 


What are the Symptoms of Lower Crossed Syndrome?

The most common symptoms of the lower crossed syndrome are lower back pain or pain within a pelvic or hip joint. Other symptoms include

  • Difficulty moving or stiffness in the lumbar spine, hip, hamstring, or pelvic region; 
  • Pain in the hip flexors, groin, spine, or gluteal muscles; 
  • Protruding stomach due to an overly arched lower back; 
  • Tension in the lower back or gluteal muscles. 


Lower Cross Syndrome Exercises

One of the best treatment techniques for the lower cross syndrome is through an exercise program. Especially if you sit for prolonged periods, it is important to take time to exercise your body and loosen your sitting muscles or gluteus maximus. The first step toward treating this condition is to loosen your hip flexor muscles and joints and strengthen the weakened abdominal and gluteal muscles, particularly the gluteus medius. The goal is to loosen any possibly tight muscles and strengthen weak muscles. Certain floor exercises and stretches can work wonders at reducing pain in the lower body. However, if these exercises fail to reduce tension and pain, you should seek help from a physical therapist. 


Muscle-Relaxing Techniques

Everyone should learn how to relax their overactive muscles. One way to do this is by using a foam roller to slowly roll parts of the body. Take the roller and use it on tight muscles such as the quads and inner thighs. If you find a tender spot, hold the position for 30 seconds


Iliopsoas Stretch

After you have relaxed your overactive muscles, it is time to begin strengthening and lengthening your weak muscles. The iliopsoas stretch or single-leg squat uses static stretching to do just that. You can even increase the severity of the stretch with the rectus femoris. 

To perform this hip flexor stretch and rectus femoris:

  1. Assume a kneeling position with your back in line with the buttocks and knees.
  2. Put one leg in front of you with the knee bent, the foot resting flat on the ground, and the toes facing forward.
  3. Lean forward into a lunge position until you feel a gentle stretch in the hip flexors and the front and back of the thigh muscles.
  4. Hold the hip flexor stretch for 15-30 seconds, then repeat using the other leg. You can increase this stretch with the rectus femoris by bending the knee more than 90 degrees during the iliopsoas stretch. 


Erector Spinae Stretch

A similar gentle stretch is called the erector spinae stretch. In this stretch, you begin by lying in a supine position or an upright fetal position with your knees tucked into your chest and your arms wrapped around your knees. Exhale and stretch while staying balanced on your back. Hold the position for 15 seconds before releasing. 


Muscle Strengthening Exercises

The last step is strengthening the muscles and hip flexor with little to no external resistance. 

One exercise you can use is called the bridge: 

  • First, lay flat on your back with your knees bent and your feet flat on the floor. 
  • Lift your pelvis into the air with your heels a few inches from your buttocks and your arms extended towards your feet. You should form a straight line with the knees, pelvis, and shoulders by keeping your shoulders on the floor. 
  • Hold the position for a couple of seconds before gently lowering the body. Repeat the exercise 10 to 15 times

Another useful exercise is called hip extension: 

  • Start on all fours with your hands directly under your shoulders, your knees under your hips, and your neck in line with your spine.
  • Stretch the right arm and left leg, keeping your hand and foot against the ground. 
  • Once you feel balanced, raise the outstretched right arm and left leg until they are parallel with your back. 
  • Hold the position for a few seconds and then slowly return to the starting position. 
  • Again, repeat the exercise 10 to 15 times

Once you have begun exercising and stretching your tight cross semi-regularly, you should begin integrated movement patterns to help your brain understand how to move the muscles. Follow the exercises your physical therapist advises you to complete to reach the ultimate goal of integration and resolving muscular imbalances. 


Dr. Doerr is the Best Chiropractor in New Jersey for Treating the Lower Crossed Syndrome!

At the Bergen Chiropractic and Sports Rehabilitation Center, our chiropractic team, led by Dr. Gregory Doerr, follows the highest and most professional medical standards to provide superior chiropractic help. After all, our mission is to provide unparalleled patient care and services in a comfortable healing atmosphere. Contact us to learn more about our chiropractic services! Our chiropractic offices in Cliffside Park, Hackensack, and Fairfield, New Jersey, are ready to welcome you. Also, feel free to access our blog page for more information on chiropractic treatments!

What are the Best Range of Motion Exercises for Shoulders?

What are the Best Range of Motion Exercises for Shoulders?

Do you experience limited shoulder movement? A rather common occurrence, limited range of mobility in the shoulder can make daily chores laborious and difficult. Whether the motion involves internal rotation or simply lifting our arm with the elbow bent, the simplest of tasks can become frustrating without our shoulders’ full range of motion. 

If you experience limited mobility in this all-important joint, you can add certain exercises to your daily schedule to increase muscle strength and range of motion. Continue reading to learn how to properly complete shoulder range of motion exercises within the comfort of your home!


What Causes Limited Mobility in the Shoulders?

Mobility is the ability of the joint to extend through its full range of motion. Several causes lie behind decreased shoulder mobility, such as tightness within the shoulder due to a previous injury or lack of muscle strength. Some more common causes of shoulder mobility limitations include: 

  • Impingement; 
  • Rotator cuff tears; 
  • Frozen shoulder joint; 
  • Overuse of the shoulder joint; 
  • Inactivity of the shoulder joint. 

For a clear diagnosis of your limited shoulder mobility, you should contact your physical therapist and schedule a shoulder special test on your range of motion. A normal range of shoulder motion is attainable with proper care and diligent exercise!


Shoulder Range of Motion Exercises

Your shoulder is the most mobile joint in the human body! When in proper working order, most joints like your shoulder can provide an incredible active range of motion, performing shoulder flexion, external rotation, and internal rotation pain-free. However, this healthy range of motion is susceptible to shoulder pain conditions and limited mobility when overused or underused. 

There are a few shoulder range of motion or shoulder ROM (i.e., range of motion) exercises for joint health and healing. Your physical therapist may also recommend certain exercise programs to help you restore your normal range of shoulder motion and decrease any active pain within the area. Use the following exercises with care during your daily living routine in addition to physical therapy to activate your full range of motion:


#1: Active Shoulder Abduction

Active shoulder abduction is the best exercise to begin your journey towards a normal range of shoulder motion. This exercise is less strenuous as it is performed while lying on one side with your troublesome shoulder on top.  

  1. Once you are lying comfortably with the upper arm elbow straight and your thumb pointed towards the ceiling, slowly lift your arm from your hip and into the air towards the ceiling until it reaches its abduction range. Keep your arm straight and in line with your body and your thumb pointed toward the ceiling. 
  2. Once in this position, move your shoulder through its pain-free shoulder ROM before slowly lowering your arm to its resting position on your hip. 
  3. Repeat the exercise 8 to 12 times and progress to the next exercise. 
  4. If you feel any worsening pain in your shoulder or arm at any point in your exercise routine, stop immediately and contact your healthcare provider before continuing any similar stretching exercises. 

#2: Active Horizontal Abduction

The next exercise is similar to the first and is called a horizontal abduction

To start this exercise:

  1. Lie on your side with your target shoulder on top.
  2. Keep your arm straight and your shoulder flexed so that your arm is out in front of you and parallel to the floor.
  3. Slowly lift your arm until it is pointing towards the ceiling in an active external rotation and hold the position for one to two seconds before you slowly bring your arm to its starting position.
  4. With your elbow straight, move through a pain-free shoulder ROM and repeat the lateral rotation 8 to 12 times. 

#3: Active Shoulder External Rotation

An active shoulder external rotation is an easy and effective exercise to increase your active range mobility, improving shoulder range of motion. 

  1. Unlike our previous exercises, begin by lying flat on your back. It is easier to complete the exercise if your knees are comfortably bent toward the ceiling with your feet lying flat on the ground. 
  2. Keep the elbow of your target shoulder against your side with the elbow bent 90 degrees. 
  3. With a cane or long stick in your opposite hand, push the stick against the hand of your affected arm so it experiences an external rotation. 
  4. Hold the position for 10 seconds before relaxing and repeating the external rotation exercise 8 to 12 times. 

 #4: Sidelying Shoulder External Rotation

Try sidelying shoulder external rotation to exercise and improve the mobility of your rotator cuff muscles. This exercise improves rotator cuff strength and neuromuscular control of this muscle group when used after rotator cuff surgery or previous shoulder injuries. However, before performing the exercise, speak with your healthcare provider and physical therapist to ensure that this exercise is right for you. 

  1. Begin the external rotation exercise by lying in the same initial positioning as our previous exercises, on your side with your bad shoulder resting on the outer end of your body. This time, keep your upper arm elbow bent at a 90-degree angle and tuck it into your side. Your elbow should stay tucked at your side during the exercise stretch while your hand should be resting comfortably in front of your navel. 
  2. Slowly lift your arm upward so that your fingers face the ceiling and your shoulder is in a slight external rotation. Keep your elbow bent into your side as you lift into a lateral rotation. 
  3. Hold it there for a few seconds before slowly letting your arm return to its neutral position near your navel. Repeat this motion 8 to 12 times. 

#5: Shoulder Internal Rotation

The next exercise will help you strengthen your normal shoulder range of motion through internal or medial rotation. 

  1. Shoulder internal rotation exercises are performed while lying on your side, but your target shoulder should be on the bottom of your body, and your unaffected arm should lie on top. For comfort, you may want to move your arm forward an inch or two, so you are not lying directly on your arm or elbow. 
  2. While keeping your elbow bent to 90 degrees and your palm facing up, slowly rotate your shoulder with your hand moving upward and your palm facing toward your navel in an internal rotation. This shoulder ROM should be pain-free. 
  3. Once your hand is up at your navel, hold the position for about two seconds before slowly lowering it to the starting position. 
  4. As always, repeat this medial rotation exercise 8 to 12 times. 

#6: Arm Swings

Standing arm swings are a more dynamic exercise that increases blood flow to the shoulder joint and involves moving your arms in a rotational motion. This exercise is a great addition to any warm-up before upper arm and body exercises and can improve mobility and flexibility in your shoulders and upper back.

  1. Begin by standing tall with each arm straight by your sides. 
  2. Engage your core and slowly rotate or swing your arms forward until they reach their abduction range without triggering shoulder pain. Raising your arms upward allows your joint to stretch into a comfortable shoulder flexion and normal ROM. 
  3. Do not raise your shoulders during this exercise. Return your arms to their starting position and repeat the motion for 30 to 60 seconds. 

#7: Shoulder Pass-through

Try using the shoulder pass-through exercise to increase joint mobility and obtain a normal shoulder range while engaging the surrounding shoulder muscles such as the teres minor. This exercise requires holding a long, easily gripped stick such as a broomstick or PVC pipe. 

  1. Start this exercise in a standing position with your feet shoulder-width apart and your arms in front of your body. 
  2. Hold the stick with an overhand grip with your palms facing downward, and keep your arms a little wider than shoulder-width. 
  3. Make sure the stick remains parallel to the floor as you engage your core to slowly raise the stick above your head, exercising your teres minor. 
  4. Keep your arms straight and lift them to the highest point you are comfortable with. 
  5. Hold the pose for a few seconds and then return to the starting position. 
  6. Repeat the exercise 5 times. 

#8: Reverse Fly

The reverse fly is a little more complicated exercise that targets the upper back and thoracic muscles, providing stability for the shoulder joint. You will need a light set of dumbbells to conduct this exercise. 

  1. Hold one dumbbell in each hand and position your feet shoulder-width apart to begin the exercise. 
  2. Slightly bend your knees and engage your core to lean forward at the waist. Keep your back straight and your arms extended with each elbow bent slightly. 
  3. With your palms facing the ground, carefully raise your arms away from your body by focussing on squeezing your shoulder blades together. 
  4. Stop and slowly return to the starting position when you reach shoulder height or the highest point you can painlessly attain with your shoulder blades. 
  5. Complete 3 sets of 10 repetitions and do not continue if you experience shoulder pain. 

#9: Dumbbell Rotation

As the name implies, the dumbbell rotation requires a light dumbbell. You can use this exercise to warm up your shoulder before overhead and throwing motions with a normal shoulder range. 

  1. Begin by standing with your feet shoulder-width apart. 
  2. Hold the dumbbell and raise your arm until your elbow is shoulder height. 
  3. Keep the proper position with your palm facing the ground and your elbow bent at a 90-degree angle. 
  4. Slowly rotate your shoulder to raise your upper arm and weight to its highest point toward the ceiling. 
  5. Slowly return to the starting position and repeat 2 to 3 sets of 12 repetitions before changing sides. 

#10: High-to-low Rows

High-to-low rows strengthen the upper back and thoracic muscles through a resistance band or cable machine. 

  1. Secure a resistance band to a sturdy object above shoulder height. 
  2. Kneel down on one knee and grab the band with your opposite hand. You can either rest your other arm at your side or on your hip. 
  3. As you slowly pull the band towards your body, keep your torso and arm straight. It is easiest to focus on squeezing your shoulder blades together while completing the motion. 
  4. Return to the starting position and repeat 10 times for 2-3 sets on each side. 

If you keep up with these exercises and other recommendations from your physical therapist, you should be able to attain your normal range of motion within no time!


Dr. Doerr is the Best Chiropractor in New Jersey for Treating Shoulder Mobility Issues!

At the Bergen Chiropractic and Sports Rehabilitation Center, our chiropractic team, led by Dr. Gregory Doerr, follows the highest and most professional medical standards to provide superior chiropractic help. After all, our mission is to provide unparalleled patient care and services in a comfortable healing atmosphere. Contact us to learn more about our chiropractic services! Our chiropractic offices in Cliffside Park, Hackensack, and Fairfield, New Jersey, are ready to welcome you. Also, feel free to access our blog page for more information on chiropractic treatments!

What Are the Best Carpal Tunnel Syndrome Exercises?

What Are the Best Carpal Tunnel Syndrome Exercises?

Most people are somewhat familiar with what carpal tunnel syndrome is. But symptoms aren’t always obvious, and some are downright confusing. Recognizing where carpal tunnel pain comes from provides cues for some of the activities and positions you should avoid. You can also learn some carpal tunnel syndrome exercises that may improve the condition.


What Carpal Tunnel Syndrome Actually Is

When you understand what carpal tunnel syndrome is, you get a better sense of how carpal tunnel syndrome exercises work. Carpal tunnel syndrome is a condition that affects the hands, wrists, forearms, elbows, and shoulders. Its symptoms range from mild to severe.

The bony side of your wrist is made up of carpal bones. However, the palm side of your wrist is softer. It contains the carpal tunnel, a narrow tube that houses nerves, tendons, and ligaments. When this passageway becomes damaged, inflamed, or compressed, it can pinch the median nerve, regulating movement and feeling in the first three fingers and thumb. As a result, the impaired nerve can’t transmit sensations properly, and you may experience numbness, tingling, and pain.


What Carpal Tunnel Symptoms Do Exercises Help With?

The spot where carpal tunnel pain begins isn’t always obvious. Symptoms may come on gradually and mildly.

When it comes to carpal tunnel, the hands are a commonly affected area. Some people have numbness in their thumb and first two fingers. Distinguishing between hot and cold sensations may be difficult. Not thinking much of it, you shake out your hand and go on with your day. Over time, you may develop pain, numbness, and weakness anywhere from your fingertips to your shoulder.

Carpal tunnel syndrome exercises help:

  • Prevent injury from repetitive motions
  • Maintain proper function and flexibility in the hands and wrists
  • Regain fine motor function after experiencing weakness
  • Relieve and prevent pain
  • Prevent muscle atrophy in the wrists and hands
  • Prevent compression in the carpal tunnel 

How to Relieve Pain from Carpal Tunnel Syndrome

Exploring where carpal tunnel pain comes from can guide you toward a solution. If an underlying health condition exacerbates your carpal tunnel hands pain, you may find relief when you control symptoms of that disease. For example, repetitive use symptoms can be alleviated by taking more frequent breaks, relaxing your grip, and stretching.

The following carpal tunnel syndrome exercises are basic and easy to do at work, in the car, or while you’re standing in line at the grocery store. Do them slowly and intentionally, and repeat the movements up to five times:

  • Wrist rotations – Keeping your wrists stable, move your hands side to side and up and down.
  • Thumb stretch – Use the opposite hand to give your thumb a gentle, backward stretch.
  • Finger stretches – Extend your fingers as straight and as wide as you can, then relax them.

The next group of carpal tunnel syndrome exercises provides a more intense stretch. Try them before and after doing an activity that exacerbates your symptoms:

  • Prayer hands – Place your palms together under your chin, with the fingers pointing up. Move your hands down to your waist while maintaining contact. Hold the stretch for up to 30 seconds.
  • Wrist flexor stretch – Holding your arms straight out in front of you with your palms facing up, bend your wrists so that your fingers point to the floor. For a deeper stretch, provide gentle pressure on the fingertips with the opposite hand.
  • Wrist flexor stretch – Holding your arms straight out in front of you with your palms facing down, bend your wrists so that your fingers point to the floor. Push on your fingers with the opposite hand to intensify the stretch.

Some movements are safer to do when your muscles, tendons, and ligaments are warm. For example, apply a hot compress to your forearms, wrists, and hands for 15 minutes before doing the following carpal tunnel syndrome exercises. Then, hold a cold compress to it for 20 minutes afterward. These exercises are excellent for working into your bedtime routine:

  • Medial nerve glide – Begin with your hand in a fist. Then, straighten your fingers and thumb, keeping them pressed together. Next, stretch your hand back toward your wrist before turning your palm to face upward and stretching your thumb gently backward with your opposite hand.
  • Tendon glide – Hold your hand in front of you, with the palm facing forward and fingers pointing up. Slowly curl your fingers into a tight fist, keeping your knuckles pointing up. You can also do this without fully curling your fingers. Instead, focus on bending straight fingers until they come close to your palm.

Here are some other tips for how to relieve pain carpal tunnel syndrome:

  • Don’t sleep on your hands.
  • Rotate your wrists and extend your fingers regularly throughout the day.
  • Wear a snug splint to limit wrist bending while you sleep.
  • Take non-steroidal anti-inflammatory drugs.
  • Use cold compresses to reduce pain.

Although you might not want to hear it, using a smartphone may increase your risk of developing this condition. If you have mild symptoms, try using your phone less frequently.


Myths about the Carpal Tunnel Syndrome

There are many myths about what carpal tunnel syndrome is, including:

  • Typing causes carpal tunnel syndromeTyping for fewer than 20 hours a week doesn’t increase your risk, although your wrist position does affect carpal tunnel pressure. Maintaining a neutral wrist position keeps the pathway open.
  • You have carpal tunnel syndrome if your hands fall asleep – A few different conditions can cause numbness and tingling in the extremities.
  • Carpal tunnel is the same as tennis elbow – Carpal tunnel elbow is not a thing. However, the syndrome can cause pain in the inner elbow, making people wonder if they have a carpal tunnel of the elbow or tennis elbow. A health care provider can help you diagnose the condition.
  • Surgery is the only option – There are many physical therapy, chiropractic, and at-home treatments. In fact, surgery is not always as effective as conservative treatments.

If you ask friends, family, and social media followers about what carpal tunnel symptoms you have, you may not get accurate answers. Learn how to ease your discomfort and remedy the source of the pain by getting professional care. An experienced chiropractor or sports treatment specialist can also ensure that a different condition or an injury doesn’t cause the pain.

We’re Looking Forward to Helping You at Our Chiropractic Offices in NJ!

At the Bergen Chiropractic and Sports Rehabilitation Center, our chiropractic team, led by Dr. Gregory Doerr, follows the highest and most professional medical standards to provide superior chiropractic help. After all, our mission is to provide unparalleled patient care and services in a comfortable healing atmosphere. Contact us to learn more about our chiropractic services! Our chiropractic offices in Cliffside Park, NJ, and Hackensack, NJ, are ready to welcome you! 


What Are the Best Exercises for Knee Pain Relief?

What Are the Best Exercises for Knee Pain Relief?

Many of you may think that people only see chiropractors for back and neck pain, but plenty of patients also seek treatment for their knee pain. Knee pain is something we all experience at some point in our lives, especially as we get older. Many athletes and fitness enthusiasts often experience knee pain due to injury, but everyday activities and movements can just as easily trigger pain and fatigue to anyone’s knees.

Before you go and decide to see a professional for your nagging knee pain, there might be some home pain relief exercises you can do when the knees start to hurt. In this article, we want to share with you some of the best exercises to relieve knee pain and strengthen them at the same time. We’ll also help you assess your level of knee discomfort so you will know when to seek proper medical attention.


The Best Exercises to Relieve Knee Pain at Home

When working the knee, we also want to target what’s above and below it – namely the ankle, calves, quads, glutes, or hips area. Frequently, there is a weakness in those regions that causes knee discomforts, and these exercises are meant to strengthen them.


Knee Exercise #1: Hamstring Stretch

This stretch targets your hamstrings, i.e., the muscles in the back of your thighs. To do this knee exercise, lay on the floor (preferably on an exercise mat). Straighten both legs, then lift one leg off the floor. Next, wrap your hands behind your thigh and gently pull your knee towards your chest until you feel a slight stretch (Note: Do not overstretch to the point where it becomes painful). Hold for 30 seconds and repeat with the other leg. Repeat the process 2-3 times.

Knee Exercise # 2: Half Squat

Knee Exercise #2: Half Squat

Half squats are a fantastic way to strengthen your quads, glutes, and hamstrings without putting pressure on your knees. To perform this knee exercise:

  1. Start by standing with your feet shoulder-width apart.
  2. Place your hands out in front of you for balance, and while looking straight ahead, slowly squat down about 10 inches (this is roughly the halfway point to a full squat).
  3. Hold the position for 3 seconds, then stand up by pushing through your heels.

We recommend doing 2 to 3 sets of 10 repetitions.

Knee Exercise # 3: Calf Raise

Knee Exercise #3: Calf Raise

Calf raises build up strength in the back of your lower legs or calves. For this exercise, position yourself next to a wall, a sturdy table, or a chair for support. Stand with your feet shoulder-width apart and start to lift both your heels off the ground. All your weight should then be on the balls of your feet. Next, slowly lower your heels back to the starting position and repeat the action 10 times. Do 2 to 3 sets of this exercise for best results. 

Note: Do not rush your movement. Control is essential to strengthening your calf muscles.

Knee Exercise # 4:Step-ups

Knee Exercise #4: Step-ups

Step-ups are perfect for strengthening your quads, hamstrings, hip flexors, and glutes. To do this knee exercise, use a large, sturdy stool, platform, or even a stair step. When you step your foot on it, your knee should bend to a 90-degree angle. Step up onto the platform with the right foot, followed by the left foot to stand on the platform. Return to the starting position by stepping down with the right foot first, then left. Do 15 repetitions starting with the right foot and another 15 reps starting with the left foot. We recommend doing 2 to 3 sets of this knee exercise.

Knee Exercise # 5: Hamstring Curls

Knee Exercise # 5: Hamstring Curls

As you can probably tell from the name, hamstring curls target your hamstrings and glutes. This knee exercise can also improve your core strength since you need to keep your upper body and hips steady when performing it. For this exercise, stand hip-width apart in front of a wall or chair for support. Lift one foot with your heels facing the ceiling, bend your knee, and raise your heels. Lift as high as you can while keeping your upper body still and hips facing forward. Hold for 5 to 10 seconds, lower down, and do the same thing to your other leg. Do 2 to 3 sets of 10 reps for each leg.

Knee Exercise # 5: Hamstring Curls 2

When Should I See a Chiropractor for Knee Pain?

If you’ve tried our knee pain relief exercises and you don’t notice any improvement with your knees, or worse, they hurt more or may have possibly stopped moving altogether, it’s probably time to go and seek help from a professional. Time is of the essence when you are dealing with knee pain – meaning, the sooner you get it examined and treated, the fewer chances of your knee pain recurring and lingering for much longer.

With the proper chiropractic care, you can address all the underlying knee conditions you might have and reduce pain, swelling, and increase your knee’s range of motion. Chiropractors can also help with that clicking sound you might be hearing from your knee joints. 

Maintenance chiropractic care is also highly advisable for sufferers of knee pain. A check-up every 1-2 months is ideal to ensure that the knee pain doesn’t return and that you can continue living a healthy, mobile, and flexible life. If you don’t take our word for it, we have research to back it up, which shows that both health costs and pain levels go down with maintenance chiropractic.

So what are you waiting (in pain) for? Get up and try these fool-proof knee exercises, or better yet, schedule a consultation with your chiropractor today.

We’re Looking Forward to Helping You at Our Chiropractic Offices in NJ!

At the Bergen Chiropractic and Sports Rehabilitation Center, our chiropractic team, led by Dr. Gregory Doerr, follows the highest and most professional medical standards to provide superior chiropractic help. After all, our mission is to provide unparalleled patient care and services in a comfortable healing atmosphere. Contact us to learn more about our chiropractic services! Our chiropractic offices in Cliffside Park, NJ, and Hackensack, NJ, are ready to welcome you! 

7 Wonderful Benefits of Daily Exercise for Sports Injuries!

7 Wonderful Benefits of Daily Exercise for Sports Injuries!

The human body is designed to move. Exercise protects your overall health and prevents a host of ailments and injuries. A healthy body positions you to experience the great things life has to offer, including the sports you love. 

Your athletic activities provide exercise packed with physical and mental benefits. Unfortunately, an injury can throw a wrench into the well-oiled machine that is your daily exercise routine. But by following the advice of your chiropractor, medical doctor, or physical therapist, you can gradually work your way back to peak condition.


Seven Benefits of Daily Exercise

What is happening to your body as you perform? Here are seven ways exercise benefits your body and mind, how those benefits are affected by injury, and how exercise and its benefits can help you heal. 


Improved Muscle and Bone Structure

Your daily exercise routine strengthens the parts that keep you in motion—muscles, bones, joints, tendons. Resistance and aerobic exercises build muscle tone and improve bone mineralization. As a result, you have greater mobility in your tissues and reduced pressure in your joints. Your cartilage health improves. With increased strength, you are less likely to fall and injure yourself. But…

If You’re Injured…Take Your Time

With a long recovery, you may lose muscle tone and stamina. Give yourself time to heal appropriately; rushing the process will only make things worse.

You will probably go through rehabilitation, “a group of physical methods, procedures, and exercises designed to improve function and stability following an illness or injury. Rehabilitation is critical in remodeling soft tissue injuries and for the alignment of fibroblast (cells that produce collagen) and proper collagen synthesis into properly repaired tissue. Rehabilitation is different from exercise as its goal is to heal and remodel injured tissue as well as stabilize the patient so they can return to a pre-injury exercise or athletic endeavors.” 

Your doctors will help you gradually, safely work your way back to fitness. 


Improved Cardiovascular Health

Your athletic activity accelerates your metabolism. This “delivers oxygen and nutrients to your tissues and helps your cardiovascular system work more efficiently.” Daily exercise lowers blood pressure, regulates cholesterol and blood sugar, and helps arteries dilate more easily. As a result, every day, you reduce your risk of cardiovascular disease

If You’re Injured…Your Heart Will Go On

Injury can keep you from that exhilarating feeling you get from your workouts. But your new exercise routine can still get your heart rate going, help you feel better, and contribute toward efficient healing. 


Reduced Risk of Chronic Disease

Your athletic activity keeps your body in motion. Therefore, muscles and organs gain strength while lingering things that can promote the disease get whisked away. 

Research at Johns Hopkins shows that a combination of aerobic exercise and strength training can lower the risk of diabetes by more than 50 percent. You also lower the risk for other conditions, including some forms of cancer and stroke. Besides, exercise reduces comorbidity—the simultaneous occurrence of multiple diseases or conditions. 

If You’re Injured…Move!

You won’t be subject to a sudden onset of heart disease and diabetes after an injury. However, moving as soon as possible, even a little, helps avoid less severe illnesses and encourages healing. In addition, a gradual build-up of exercise will go a long way toward a return to your sport. 


Better Sleep

With your daily exercise routine, you likely find it easier to fall and stay asleep. That is because deep sleep refreshes your brain and body. However, exercise releases endorphins, which can keep you awake. So give yourself a few hours between exercise and bedtime. 

If You’re Injured… Be Still for a While

You may need some time to rest, especially right after your injury. So, increase your sleep time for a while. During sleep, your brain releases growth hormones that generate new muscle, bone, and other tissues that repair the damage. 


Improved Sex Drive

Daily exercise can improve your sex life. Exercise boosts blood flow and increases arousal in both men and women. In addition, research has shown that people who exercised vigorously reported improved sexual desire, activity, and satisfaction.   

Exercise increases your overall energy level and makes you look great, leaving you with a feeling of  confidence and attractiveness.


Weight Control

Weight control depends on balancing diet and exercise. As an athlete, you need to consume more high-quality calories than the average person to fuel your activity level.

If You’re Injured…Seek a New Balance

You may need to reduce your diet; you will burn fewer calories during recovery. Still, maintaining a healthy, balanced diet will encourage healing when combined with your rehabilitation. 


Improved Mental Health

Getting daily exercise while participating in a sport you love makes you feel great. A good workout can burn away stress and help alleviate symptoms of anxiety and depression. 

When you use daily exercise to stay fit, you look good, giving your self-esteem a boost. You also have the social camaraderie of the team and workouts with like-minded people.

If You’re Injured…Be Kind to Yourself

You don’t like slowing down. Maybe you’re worried about your continued ability to perform your sport. It’s vital to avoid falling into the grip of depression or other mental illnesses. As recommended by your doctors and therapists, maintaining a modified daily exercise routine will keep you feeling empowered and focused on healing. Set goals and document your progress. Most importantly, be patient with yourself. 


We’re Looking Forward to Helping You at Our Chiropractic Offices in NJ!

As an athlete, you are focused on your performance and maintaining peak physical condition. But when injured, your focus shifts to getting back to normal. Because your pre-injured body is well conditioned, all those exercise benefits will work in your favor. You may lose muscle tone, or your metabolism may slow down, but if you do as the experts recommend, you can return to normal safely and relatively quickly. 

Take care of your body, and your body will take care of you. Daily exercise will protect you from the lasting effects of illness and injury, giving you more time to enjoy your sport and a greater chance at a long, healthy life.

At the Bergen Chiropractic and Sports Rehabilitation Center, our chiropractic team, led by Dr. Gregory Doerr, follows the highest and most professional medical standards to provide superior chiropractic help. After all, our mission is to provide unparalleled patient care and services in a comfortable healing atmosphere. Contact us to learn more about our chiropractic services! Our chiropractic offices in Cliffside Park, NJ, and Hackensack, NJ, are ready to welcome you! 


Bibliography

https://bergenchiropractic.com/athletic-injury-treatment/
https://www.webmd.com/fitness-exercise/exercise-after-injury#1
https://www.menshealth.com/fitness/a20527362/how-to-work-out-after-injury/
https://www.cdc.gov/physicalactivity/basics/pa-health/index.htm
https://www.mayoclinic.org/healthy-lifestyle/fitness/in-depth/exercise/art-20048389
https://www.hopkinsmedicine.org/health/wellness-and-prevention/7-heart-benefits-of-exercise
https://www.hopkinsmedicine.org/health/wellness-and-prevention/exercising-for-better-sleep
https://www.health.harvard.edu/heart-health/the-many-ways-exercise-helps-your-heart
https://www.webmd.com/sex-relationships/ss/slideshow-better-sex-exercises
https://www.health.com/sex/exercise-and-sex